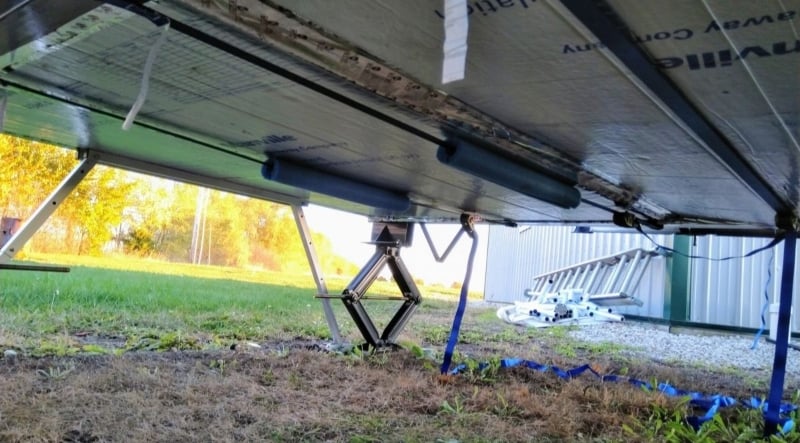
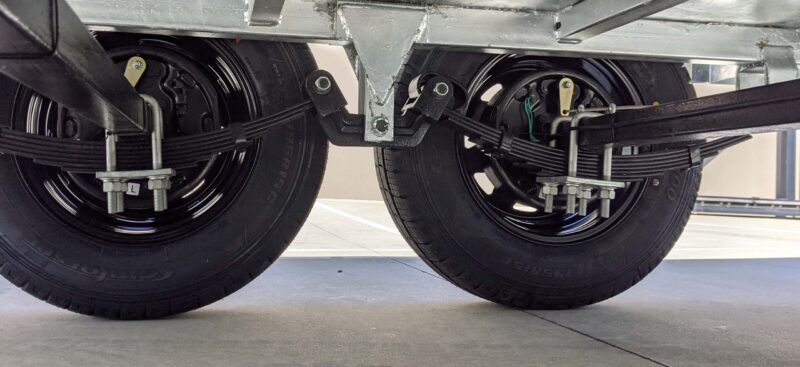
In this article, we will show you how to insulate your RV underbelly and why it is important. Also, we have step-by-step instructions on how to do the work yourself. Follow us as we explore how to insulate an RV underbelly.
Why Do You Need to Insulate Your RV Underbelly?
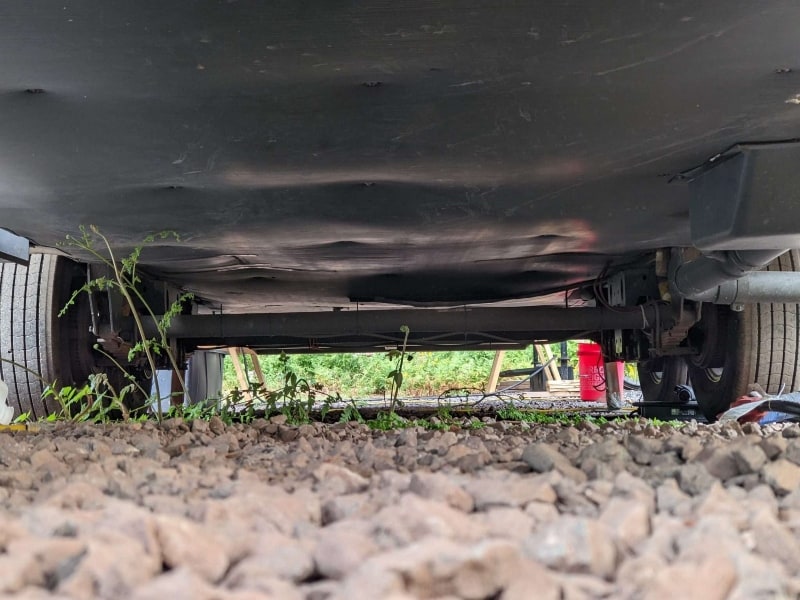
Since 2019 or 2020 (depending on the manufacturer), RV makers started adding coroplast plastic under RVs. These newer models have insulated RV underbelly features that can guard against cold winters and desert-type summers. Yet you may have found a great deal on a travel trailer that was built without this component.
If you are a new RV owner, you may wonder why you would insulate the RV underbelly area. Your travel trailer may or may not be designed to handle cold or hot-weather travel.
That does not mean you cannot travel in extreme temperatures. It just means that if you want to travel during times of cold or hot weather and be comfortable, you will need to make some modifications.
The underbelly of your RV is the outer section that faces the ground. Traveling during mild weather, you will not necessarily notice the outside temperature through the floor.
However, when you travel during the winter or summer, the lack of insulation on the underbelly can make your RV floor cold or hot.
Besides managing the interior temperature of your RV, underbelly insulation will also provide some protection against frozen water lines. Temperature swings can also cause water line fittings to contract, potentially resulting in leaks.
What’s the Difference Between RV Underbelly Insulation and Skirting?
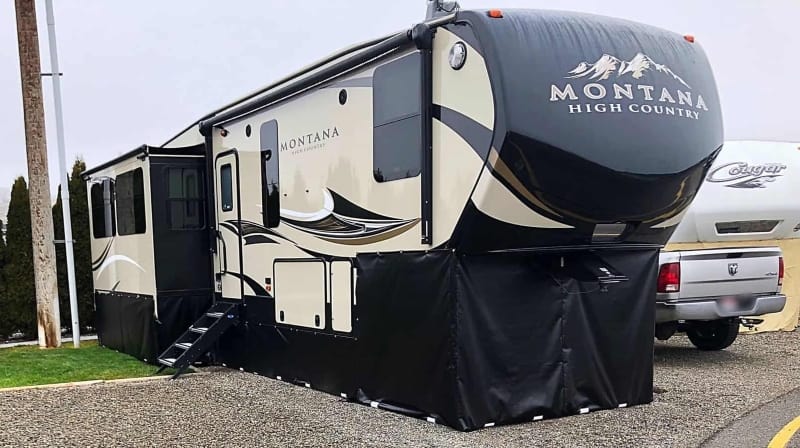
Many of us have heard the term RV skirting, but you may not know the difference between it and insulation. Insulation and RV skirting are two different things, and they work in two different ways.
RV insulation is a layer of foam or other material that is fixed directly to the underbelly surface. Insulation provides an additional layer of separation between the underbelly and the surrounding air. It does not need to be removed when traveling, as it has been attached using adhesives or some sort of tack.
RV skirting is a temporary feature that is added to your RV to limit the airflow under the rig. It does provide some protection for the underbelly from drafts or a build-up of snow. RV skirting is generally added to a travel trailer or motorhome that is going to be parked in one location for a while.
Besides protecting the underbelly from weather, RV skirting can also keep animals from causing damage to your RV underbelly. RV skirting is not permanent. It is designed to be removed and stored in your RV when traveling.
If you want to learn all about RV skirting, check out our article on RVBlogger.com called RV Skirting for Winter – DIY or Brand Name?
What Is the Best Method of Insulating Your RV Underbelly?
There is a bit of debate about which method of insulating your RV underbelly is best. Some people think that skirting is the way to go, while others swear that insulation is ideal.
Either method provides a good amount of protection when installed correctly. The one you use or is best for your situation is the one that is easiest for you to install. Both options are great at reducing the exposure of the RV underbelly area to low temperatures.
However, if you are not comfortable with digging around under your RV, you may want to invest in easy-to-install skirting. The best skirting we have found is AirSkirts. In fact, Mike and Susan did a temperature test on AirSkirts. You can check it out in the YouTube video below!
Adding insulation may be the perfect solution if you don’t mind a bit of tinkering and do not want to add an additional step to your setup and teardown routine.
Ideally, insulating your underbelly by sealing it with a coroplast layer that seals in the insulation and using RV skirting is best. Using both methods restricts weather, moisture, and “uninvited guests” from getting inside your travel trailer.
What Is Insulation R-Value?
The R-value of insulation, whether it is for RVs or not, is a measurement value of the material’s resistance to heat exchange, or conduction. Insulations with higher R-values are better at insulating your RV.
Factors that impact the R-value of insulation include the material that the insulation is made of, the thickness of the insulation, and the density of the material.
What Is the Best R-Value for RV Underbelly Insulation?
Before you select an insulation material for your RV underbelly, you will need to consider how much temperature control you want. This means you need to know when you are going to be traveling with your RV, and perhaps even some of the locations that you might consider.
If you are just looking to extend your travel season into the shoulder months (March in the Spring and October in the Fall), you will need a different R-value than if you are going to winter camp.
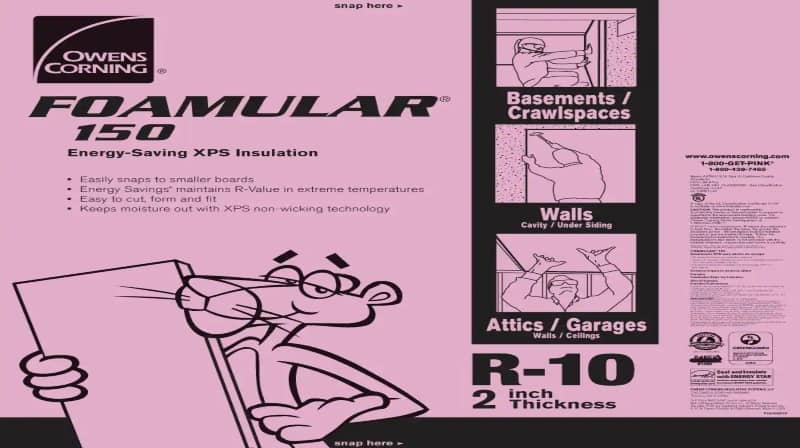
In general, look for insulation products that have R-values that range between 3 and 7. There are insulation products that have R-values that are as high as 25, but these products are better suited for insulating the attic of your home.
What Type of Insulation Is Best for Your RV Underbelly?

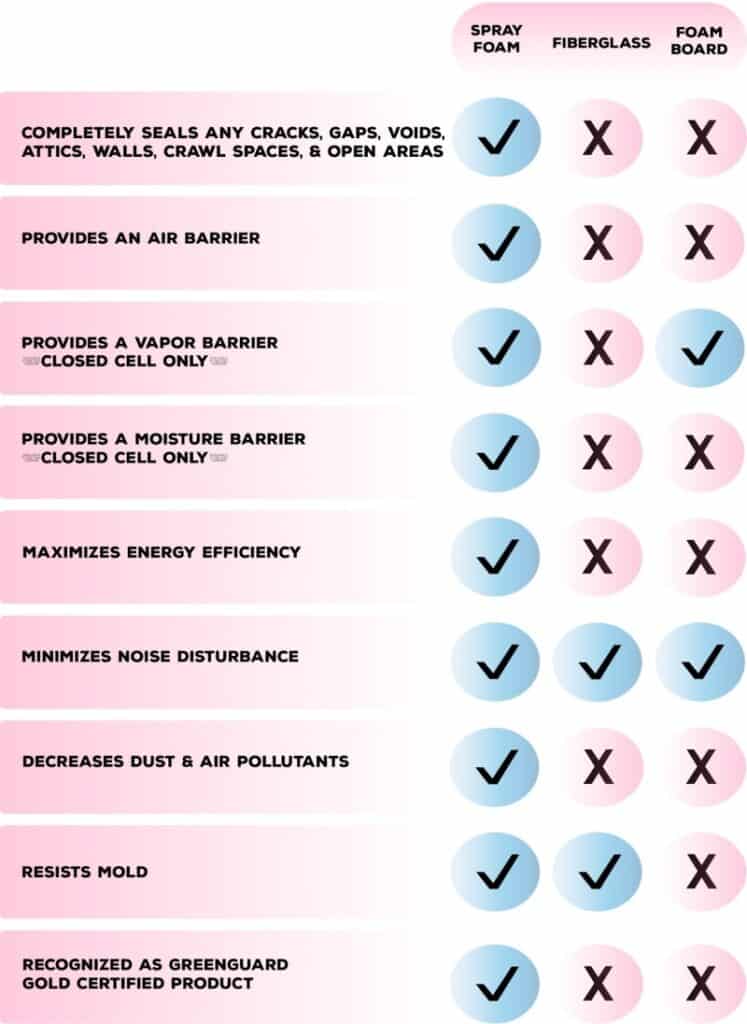
Not all insulation materials are created equal when it comes to what to insulating RV underbellies. There are a few options, and you need to carefully consider which is best for your travel needs and the installation process.
1. Foam Board
Using foam board is always a great choice for insulating your RV’s underbelly. It is affordable, easy to find, and easy to install. Some advantages to using foam board include fire resistance, affordable price, and resistance to moisture.
2. Fiberglass
When you think of fiberglass insulation, the best example is the rolls of pink insulation that you use in your home. This type of insulation has a very high R-value but can be tricky to install.
Besides being cumbersome to manage, there are some safety issues to consider with fiberglass insulation. Also, this type of insulation tears easily and does not tend to be resistant to moisture.
While cumbersome, many towable RVs use fiberglass insulation in the ceiling and floor because of its high R-value.
3. Spray Foam
Using spray foam is really the ideal insulation for your RV underbelly – if you can elevate your RV. It can be added with minimal disruption to features underneath your RV. The best part is that spray foam insulation does not need to be measured, cut, or tacked with some other material.
Spray it on, and it sticks where you spray it. It is moisture-resistant and fire-resistant. However, spray foam, is the most expensive of the insulation options, but closed-cell spray foam has a very good R-value.
6 Steps to Insulate an RV Underbelly
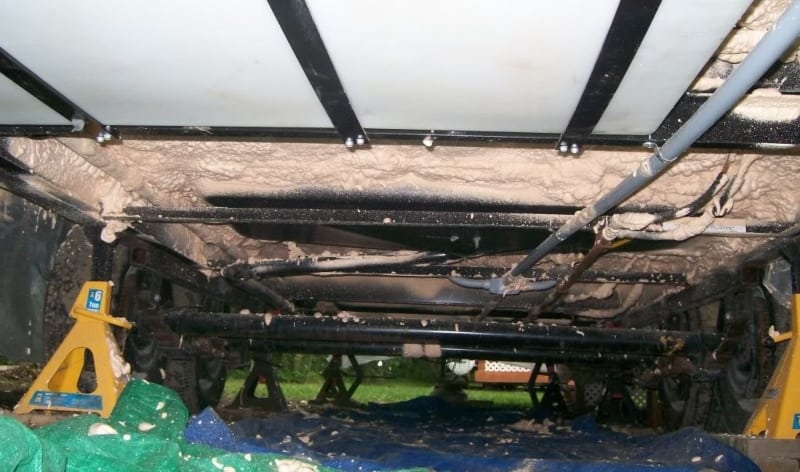
If you are ready to insulate the underbelly of your RV, there are some basic steps that you will need to take. Some people prefer to have someone else do this work. However, if you are on a budget, the process of insulating your RV underbelly areas is not difficult.
1. Measure for Materials
Before you start doing work under your RV, you need to measure the area of the underbelly. This will allow you to purchase the right amount of insulation. It will also give you a good idea of how much prep work you will need to do before adding your RV underbelly insulation.
Make sure that you measure the area of the underbelly as well as the depth of the frame.
2. Gather Your Materials
Before you jack up your motorhome and start working on the underbelly, you need to get all the materials and tools that you will need. This includes the adhesive, tacks, or staples that you are using to install the insulation, a sharp knife, and your ruler or tape measure. You don’t want to be running around looking for supplies when you just want to be working.
Keep in mind, this project is not one to do the night before heading out of town. Adding insulation to the underbelly of your motorhome takes time and should be done properly. So, make sure you have time, and all the materials that you need, before you start to work.
You will also want to get the coroplast corrugated plastic sheeting that will act as the protective layer between the road and the underbelly insulation. Hardware stores do have it, but you can also order it online.
3. Safely Jack Up Your RV
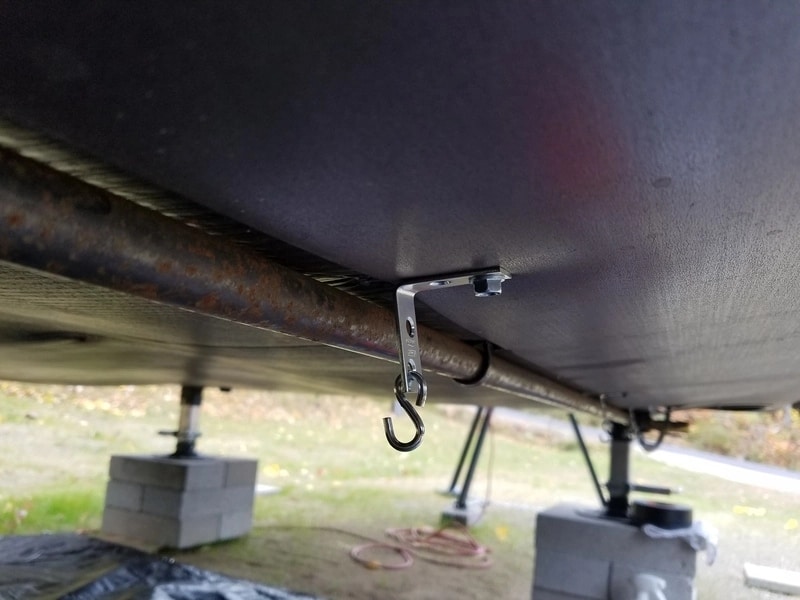
Once you are ready to start working on adding insulation to the underbelly of your motorhome, you will need to lift it so you have room to work. Jacking up your RV properly is very important and ensures that you can work safely.
Jacking up your RV is a process you should do very carefully. Travel trailer leveling jacks can be used to get the process started. However, you really need to use properly rated jacks that can hold the weight and the proper jack stands.
Before jacking up your RV, make sure that you are parked on a flat surface. Remember always to place jack stands on the frame of your RV. This is the most secure spot for holding up your RV.
You will want to use at least four weight-bearing jacks for the most stable condition. More than four jack stands may be necessary if you have a larger RV.
4. Detach Obstructive Pipes and Wires
Once your RV is securely set on the jacks and you have plenty of room to work, it is time to get to work. Before you can start installing your underbelly insulation, you will need to remove some obstacles.
When you crawl under your RV, you will notice that there are a lot of wires and pipes that run along the underbelly. You don’t want to work around these, so you should detach and clear some room.
Don’t just start disconnecting wires and piping randomly. To make life easier when you are putting everything back together, label wires and pipes so you know what they are and where to replace them. This one little step may add a bit of time to the process, but it will make your life less frustrating in the end.
5. Apply Insulation
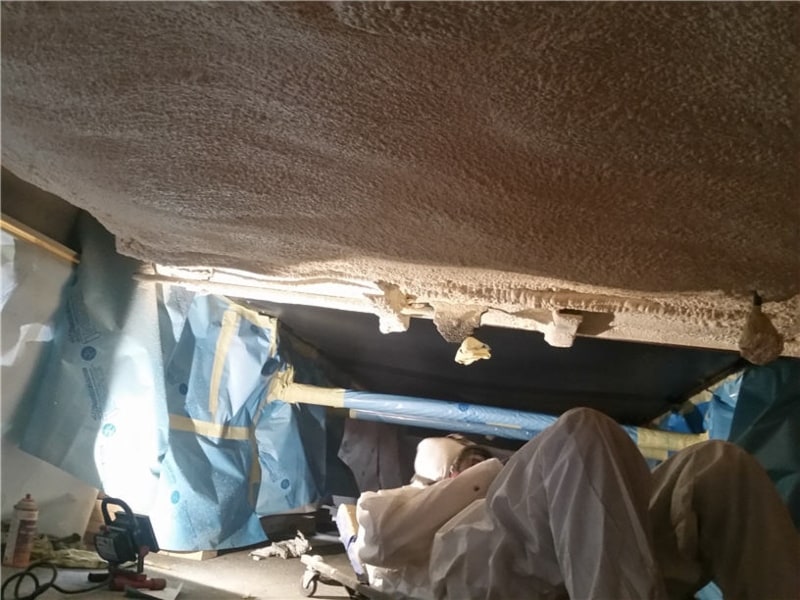
Once you have your motorhome safely raised, and all of your materials gathered, you can start measuring and applying insulation.
If you are going to insulate RV underbelly areas with spray foam, you will want to make sure that you are wearing proper protective clothing, including safety glasses and a mask. This will prevent you from getting foam in your eyes, nose, or mouth. Spray foam should be applied in a single, even coat.
If you are using a rigid foam board, your first step is to measure and cut each piece to fit. There is the old saying, “Measure twice, cut once.”
This is a good idea to keep in mind. Foam insulation is not expensive, but you don’t want to waste any because you measured poorly. Take your time and measure carefully.
Cut your foam board with a sharp knife or jigsaw. To apply it to your RV underbelly, you will first want to use a construction-grade adhesive. This will do two things. First, it will hold the foam board to the underbelly so you can screw it down.
Second, it adds an additional connection to the underbelly of your RV, in those places where you can’t add a screw or don’t want to screw into a water tank or wiring harness.
With the foam board glued to the underbelly, you can now screw it down. Hardware stores generally sell foam insulation with ring shank nails. These tend to wiggle out over time. The better option is to use a coarse-threaded screw with a washer.
6. Restore Pipes and Wires and Add Protective Elements
When your travel trailer’s underbelly is sufficiently insulated, you can reconnect wiring and piping. For an extra measure of protection for your RV’s plumbing, you can also add pipe insulation to water lines and drain lines.
You can pick up pipe insulation at the hardware store when you pick up your insulation. Use zip-ties to secure the pipe insulation to exposed plumbing.
7. Seal The Underbelly with Coroplast Sheeting
To protect all of your hard work from road debris, campground sticks, insects, and rodents, seal the RV underbelly up with corrugated coroplast sheeting. Besides creating a barrier from anything destructive, the coroplast sheeting does insulate the RV underbelly as well. The material does not have a big R-value, but it works well with the insulation you just installed.
RV manufacturers are adding separate coroplast pieces in areas that are below places where service work is usually performed. This way, instead of removing an entire section, a smaller specific rectangular piece can be easily removed with a screwdriver or wrench to get to a specific part. You may want to put some thought into this when installing it.
What To Know About Using Spray Foam For Your RV Underbelly
Spray foam is a very convenient way to insulate your RV underbelly. If you haven’t used it before, there are some things to keep in mind.
First, test the spray foam on a piece of cardboard or plywood before you start applying it to the underbelly. Spray foam expands very quickly, and if you use too much in one place, you can end up with a mess. Do some test sprays to learn how it expands.
Second, don’t coat things like your brake lines or water pipes. These may need to be accessed for repairs, and you don’t want to chunk out the insulation to do repairs. Cover these critical features with folded cardboard tents or even a layer of newspaper.
Finally, though spray foam sets up pretty quickly, it will take a few days to cure fully. This is not a great product if you need to hit the road right after you install underbelly insulation. If you can wait a day or two for the foam to become completely firm, that is the ideal solution.
What Is The Best Material To Use For Skirting?

There are plenty of options for RV skirting. The best really depends on your preferences, and how much space you have for storage. If you are using skirting for extra insulation during winter camping, the same foam board you used to insulate RV underbelly areas is a great option. It can be cut to the right size and is lightweight.
Other materials that can be used for skirting are plywood, corrugated metal or plastic sheeting, or even a thick canvas fabric. Many online RV accessory stores will sell skirting that is premade for your particular RV model. Learn more about RV skirting in RVBlogger’s article about AirSkirts Inflatable RV Skirting.
Should You Skirt And Insulate Your RV?
As we mentioned above, skirting or insulating your RV underbelly are both good solutions. You can skirting and further insulate your RV underbelly for the best outcome.
Even if you are not camping in Washington State in January or Arizona in July, having that windproofing protection due to the skirting will make a big difference. By having that thoroughly insulated RV underbelly, whatever the temperature is under the rig, you will have that extra layer of protection to keep yourself comfortable in the hot summer or cold winter months.
For those who enjoy winter sports like hunting, ice fishing, or skiing, using both methods will also give you the best heat retention in your RV.
A Few More Thoughts On Insulating The Underbelly Of Your RV
We’ll round out our discussion about how to insulate an RV underbelly with some frequently asked questions.
1. Why Does an RV Underbelly Not Have Adequate Insulation?
Most RVs are not designed for all-weather camping. Most motorhome owners prefer to travel during warmer months. In this case, you don’t need extra insulation.
2. Does RV Skirting Help In Winter?
RV skirting can help keep your motorhome warm in the winter. It can also keep snow from building up under your RV and protect the underbelly from rodents and other small animals.
3. Should You Install A Heated Underbelly System?
Underbelly heating systems are another option for keeping your RV warmer in the winter. They are more expensive, and they do need power to operate. If you have the cash and know you can accommodate the additional power usage, this is a great option.
4. How Cold Should It Be To Insulate Your RV Underbelly?
If you are going to be traveling to places where the temperature will dip below about 40°F, for more than a day, you may need underbelly insulation. Adding insulation will protect your water lines and holding tanks from freezing.
5. How Do You Keep Your RV from Sweating In The Winter?
Sweating or condensation inside your motorhome in the winter is an annoyance. It can also damage the frame and windows of your RV.
To keep moisture out of your RV, use your exhaust fans, increase the temperature on the thermostat, and cover pots and pans when cooking.
6. Does The Underbelly Material Matter When Installing Insulation?
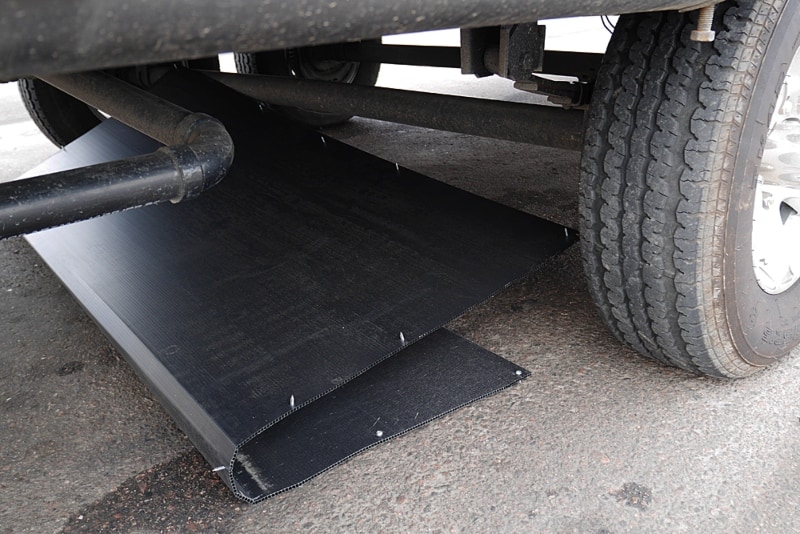
The best material to use when installing insulation in your RV underbelly is corrugated plastic, called coroplast. Using this material to protect your underbelly’s insulation will protect it from various road hazards like rocks, sticks, and water that can damage the insulation.
The only consideration with the underbelly material is the type of screw you may need to use to secure foam board insulation.
7. Would You Use Different Insulation For A Drivable VS. Non-Drivable RV?
No, you do not need to use different insulation for motorhomes or travel trailers. Either spray foam or foam board are good options for both.
8. Should You Skirt Or Insulate Your RV When Storing It For The Winter?
If you are just storing your RV in the winter, underbelly insulation is not necessary. However, you may want to skirt your motorhome or travel trailer. Skirting will keep small, furry, unwanted visitors from making a home in your RV.
9. Can You Hire Someone To Insulate Your RV Underbelly?
Yes, you can hire someone to insulate your RV underbelly. This work can be done at your local RV dealership, or look for an RV technician or company that does this kind of work.
10. Should You Add Insulation To Other Parts Of Your RV?
There are other places where you may want to add insulation to your RV. The doghouse (engine hump) on motorhomes is frequently not insulated enough and can be a source of unwanted heat or cold.
In addition, if you plan on winter camping, it is a very good idea to add black, grey, and freshwater heat pads to your tanks. They are pretty inexpensive and easy to install.
You could also add additional insulation to the walls and the roof, but this is a substantial project.
Final Thoughts On How To Insulate An RV Underbelly
Adding a layer of insulation to your RV underbelly is a great way to improve the heating and cooling efficiency and, therefore, the interior temperature of your motorhome.
The process of insulating an RV underbelly is one that many motorhome and travel trailer owners can accomplish on their own. It is not a difficult process but may take a little time and effort.
If you are ready to start winter camping or extend your season, insulating your RV gives you more travel time options. Whether you pick spray foam or foam board insulation, both will keep your motorhome warm and cozy, even on chilly fall nights.
Related Reading:
1. Should I Add A Second Battery To My Camper?
2. How Often Should You Grease Travel Trailer Wheel Bearings
3. 9 Best Ways To Make RV Entry Steps Safer
4. 10 Things To Know About RV Window Replacement
5. Can a Camper Tip Over When Parked?
About the Author:
Jason Gass is a full-time freelance writer and part-time RVer whose goal is to share great stories around a campfire with good friends.
When he’s not working, he spends most of his time camping, searching for the best breweries, and road-tripping in his teardrop trailer with his wife, daughter, and two dogs.


